
















How to Install an Electric Fence Energizer: Solar, DC and AC/DC
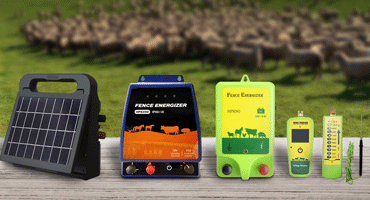
Most energizer failures reported in the first month are installation faults, not product faults: a shaded solar panel, a reversed battery terminal, an earth rod driven into dry gravel, or a lead clipped to an insulated post. The three power types fail in different ways, so this guide walks through each one separately — solar, DC battery and AC/DC — with the checks that prevent the call-back.
Install in this order: mount the unit out of reach of stock, earth it with one 20 mm × 1 m rod per joule of output, connect the fence lead to the live terminal, then test at the terminals and at the far end before switching on. Solar adds panel angle and battery placement; DC is battery-only; AC/DC needs the supply selected before the battery is connected. Target 6,000–8,000 V at the terminals and never below 2,000 V at the far end for cattle.
Quick facts
- Earth rods scale with output: 1 rod for a 1 J energizer, 4 for 3.5 J, 5 for 4.8 J, 8 for 8 J and 12 for 12 J (KZN Agriculture).
- Target readings: 6,000–8,000 V at the energizer terminals; 2,000 V minimum at the far end for cattle, 3,000 V for wooled sheep.
- Solar panels lose output when shaded by 20% — even a single post shadow can halve charging.
- All three types share the same MOQ: one unit, with mixed-model orders accepted.
Before you install: the four site checks that decide success
Walk the site before opening the box. Four checks decide whether the installation will hold voltage in six months, and each one is easier to fix before the unit is on the post.
- Earth: where will the rods go, and is the soil damp for most of the year? Dry sand or gravel needs more rods, not a bigger energizer.
- Power: is there a mains outlet within cable reach, or does the site need solar or battery?
- Sun: for solar, which direction faces the midday sun, and what casts shadow in winter?
- Mounting height: the unit needs to sit above stock reach and above flood level, usually 1.2–1.5 m.
Three types of electric fence energizer installation
| Type | Power source | Typical models | Where it mounts | Main risk |
|---|---|---|---|---|
| Solar | Panel + 12 V battery | HPSS050, HPSS350, HPSS600 | Outdoors, on a post or wall facing the sun | Shade and winter charging |
| DC | 12 V battery only | HPS050, HPS100, HPS200, HPS350 | Portable — post, fence line or vehicle | Battery drain without warning |
| AC/DC | Mains 110–240 V or 12 V | HPSA050-AC/DC, HPSA200-AC/DC, HPS350, HPS480 | Barn wall, shed or permanent post | Wrong supply selected, lightning |
Model lists reflect the installation videos published for each type, not the full catalogue.
Solar electric fence energizer installation, step by step
Solar is the type most often installed badly, because the panel and the battery are separate decisions. Work in this order and the unit will still be charging in February.
- Mount the energizer at 1.2–1.5 m, in the open, with the panel facing the midday sun and tilted roughly 30–45° from horizontal for a mid-latitude site.
- Fix the panel so no part of it is shaded between 10:00 and 15:00 — check for posts, trees and building shadow at the winter sun angle, not today's.
- Run the panel lead to the controller input, observing polarity. Reversed panel leads are the most common cause of a “dead on arrival” solar unit.
- Fit the 12 V battery, again observing polarity, and confirm the charging indicator before closing the housing.
- Drive the earth rod within cable reach, clamp the earth lead to the energizer's earth terminal — never to a building earth.
- Connect the fence lead to the live output terminal, then to the fence conductor through a proper connector, not a wrap of wire.
- Test at the terminals, then at the far end, and record both readings for the customer.
The published installation videos for this type show the panel, battery and terminal layout on each model: solar energizer installation videos.
HPS100S solar energizer — details and installation walk-through
HPSS100 solar energizer — panel, battery and terminal layout
DC electric fence energizer installation, step by step
DC units are the simplest to fit and the easiest to get wrong on battery condition. The unit has no charging circuit, so whatever battery goes in is what the fence gets until someone changes it.
- Mount the unit where it will not sit in water, and where the battery can be reached without dismantling the fence.
- Connect the 12 V battery with correct polarity — most DC units have reverse-polarity protection, but relying on it is not an installation method.
- Drive the earth rod and connect the earth lead to the energizer's earth terminal.
- Connect the fence lead to the live terminal and to the fence conductor.
- Switch on and confirm the pulse indicator, then read voltage at the terminals and at the far end.
- Note the battery type and date on the unit, so the next service visit has a baseline.
Terminal layout and battery compartment differ between joule classes: DC energizer installation videos by joule rating.
HPS200 — replacing the high-voltage transformer
AC/DC electric fence energizer installation, step by step
AC/DC units work from mains or a battery, and the installation decision is which source the site will actually use. Fit both paths, then label the unit so the next person knows which one is live.
- Mount the unit on a dry wall or permanent post, with the mains lead protected in conduit and terminated in an RCD-protected outlet.
- Select the supply mode on the unit before connecting anything: most AC/DC models switch automatically, but models with a selector must be set correctly.
- Fit the 12 V battery as backup where the model supports it, observing polarity.
- Drive the earth rod and connect the earth lead to the energizer earth terminal, not to the mains earth.
- Connect the fence lead to the live terminal and to the conductor.
- Test at the terminals and at the far end on each supply mode, then leave the unit on the mode the customer will use.
- Fit a lightning diverter where the fence runs exposed, and label the unit with the supply in use.
The AC/DC wiring sequence is shown model by model here: AC/DC energizer installation videos.
HPS1200NS — LCD energizer set-up and installation
Earthing: the step that decides whether any of the three works
All three types share one failure mode. The pulse leaves the energizer, travels the fence, passes through the animal and returns through the soil to the earth rods. If that return path is poor, the animal feels less — and the customer concludes the energizer is weak.
20 mm × 1 m galvanised rods, spaced at least 3 m apart along the fence line, not bunched at the unit. Dry soil needs more rods, not a bigger energizer.
Testing and commissioning: what to read and when
| Reading point | Target | If it is low |
|---|---|---|
| Energizer terminals | 6,000–8,000 V | Check battery, panel or supply first |
| 1 km along the fence | Within 10% of the terminal reading | Joint, connector or insulator fault in that span |
| Far end, cattle | 2,000 V minimum | Earth, conductor or vegetation load |
| Far end, wooled sheep | 3,000 V minimum | Earth and strand layout, not energizer size |
Record both readings on the handover sheet. A documented baseline turns the first complaint into a comparison instead of an argument.
Installation mistakes that come back as warranty claims
- Earth rod in dry gravel or under a concrete apron. The unit tests fine on the bench and fails on the fence.
- Fence lead clipped to an insulated post. The pulse has nowhere to go; the fence reads zero and the unit gets blamed.
- Solar panel shaded by the very post it is mounted on. Output collapses and the battery never recovers.
- Battery reversed or of the wrong chemistry. Rechargeables in cold weather are the classic winter failure.
- Mains earth used as fence earth. It couples noise into the installation and defeats the return path.
- No lightning protection on exposed runs. Not a warranty item, and always blamed on the energizer.
HPS FENCE as an electric fence energizer manufacturer
HPS FENCE is the brand of Hangzhou Opus Fence Supplies Co., Ltd, building energizers in Hangzhou since 2013 with category experience back to 2002. Output spans 0.25 J to 12 J across mains, battery, solar and AC/DC formats, sealed to IPX6, and shipped to distributors in Australia, New Zealand, Europe, the United States, Canada, South America, Korea and Japan.
Real output test method published, not just a label value.
Read the test methodContinuous run with output, energy and temperature monitored.
See the production processPackaging verified for container and parcel transit.
See the drop testVerified per production batch, not on a single prototype.
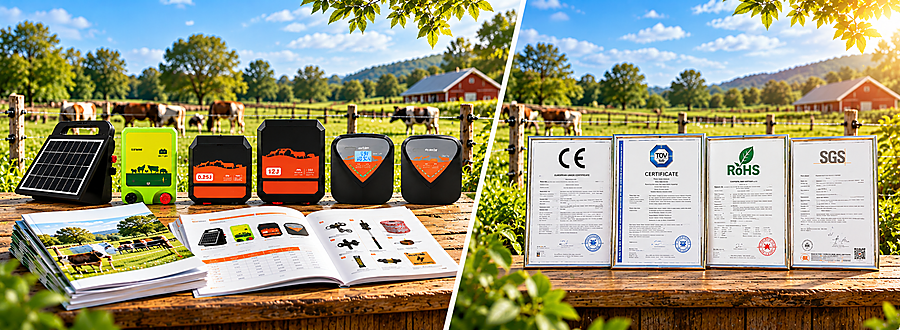
View certificationsEvery unit checked before packing, with batch traceability.
Inspection stepsOutput and safety data filed by model and batch, supplied with the order.
Request a batch recordOEM and private label for energizer ranges
Private label covers the housing label, retail box, manual, model naming, colour and output specification — including a market-specific installation manual. Label-only changes start at one unit on stock models; a new housing or joule rating is quoted as an ODM project with MOQ confirmed per project.
Branding and packaging
- Logo on housing, retail box and manual
- Model naming and colour to suit your catalogue
- Packaging engineered for e-commerce and container transit
Technical and documentation
- Output voltage and joule specification per market
- Multilingual manuals, including installation guides
- Full ODM development with scheduling and sample approval
Wholesale terms for energizer buyers
Energizers used in these three installations

Solar 6 J
6 J input · 3.6 J delivered · 60-mile range
Remote cattle runs: panel, controller and 12 V battery in one housing.
View product details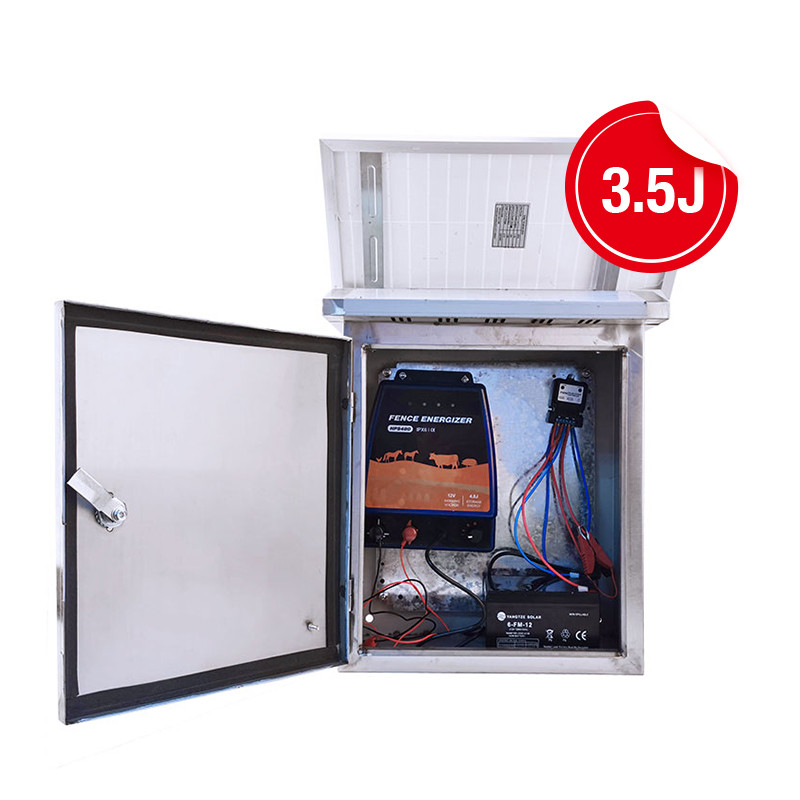
Solar 3.5 J
3.5 J input · 2.1 J delivered · 30-mile range
Paddocks without mains, horses and cattle on medium runs.
View product details
0.25 J AC
0.25 J stored · 0.13 J delivered · 110–240 V
Poultry netting close to a power point.
View product details
2 J dual source
2 J delivered · 9 kV peak · AC or 12 V
Mixed farms where mains is available but not guaranteed.
View product details
3.5 J AC/DC
3.5 J · 55 miles clean fence · 250 acres
The most-installed unit for cattle and horses on permanent fence.
View product details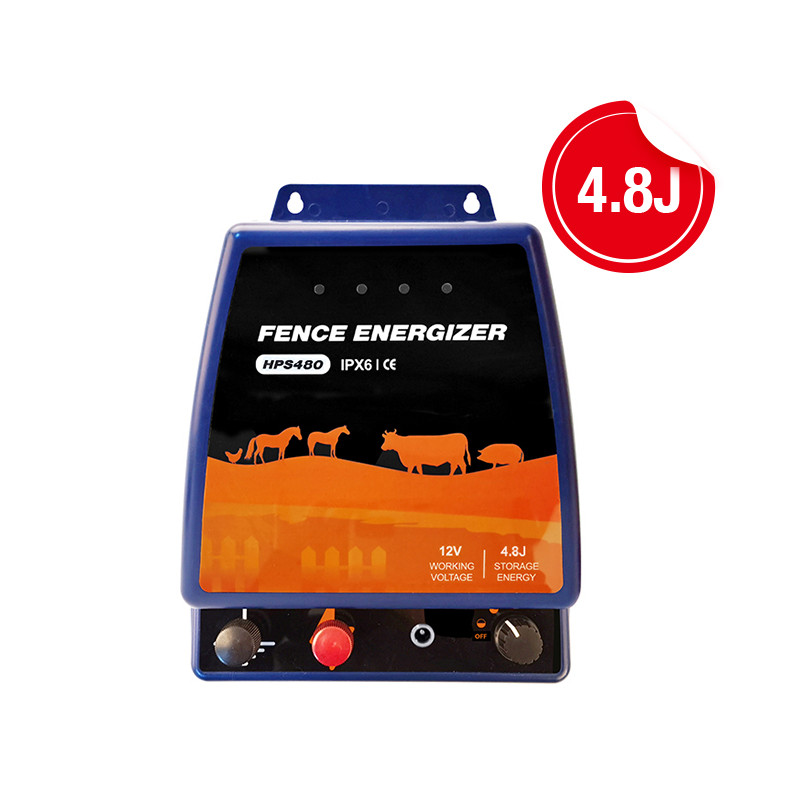
4.8 J AC
4.8 J · AC 110 V · added power reserve
Long boundary runs through grass, barn-mounted.
View product detailsElectric fence energizer installation FAQ
How do I install an electric fence energizer?
Mount it 1.2–1.5 m above ground, drive the earth rods, connect the earth lead to the energizer's earth terminal, connect the fence lead to the live terminal, then test at the terminals and at the far end before switching on. Solar, DC and AC/DC differ only in the power path.
How many earth rods does an electric fence energizer need?
One 20 mm × 1 m rod per joule of output: 1 for a 1 J unit, 4 for 3.5 J, 5 for 4.8 J and 12 for a 12 J unit. Space them at least 3 m apart along the fence line, and add more in dry or rocky soil.
Where should a solar energizer be mounted?
In the open, at 1.2–1.5 m, with the panel facing the midday sun and nothing shading it between 10:00 and 15:00 — including the post it is mounted on. Check winter shadow, not just today's.
Can I use a mains earth rod for the fence?
No. The fence needs its own earth rods connected to the energizer's earth terminal. Using a building earth couples noise into the installation and weakens the return path.
What is the MOQ for wholesale energizers?
One unit on energizers, testers and coop doors; 100 units on other categories. Mixed-model orders are accepted, so a dealer can stock one unit of each power type for demonstration.
Sources
- KZN Department of Agriculture & Rural Development — Electric Fencing in Agriculture: earth rod count and spacing, minimum voltage by species.
- IEC 60335-2-76:2002+A1:2006 / BS EN IEC 60335-2-76:2021 — output energy ≤5 J, pulse duration ≤10 ms, repetition rate ≤1 Hz.
- HPS FENCE installation videos — solar, DC and AC/DC energizer wiring sequences by model.
- HPS FENCE product specifications — output energy, power source and IPX6 rating across the 0.25–12 J range.
HPS FENCE · MANUFACTURER & WHOLESALE SUPPLIER
Your Trusted Partner for Electric Fencing & Farm Solutions
From electric fence energizers and fencing accessories to poultry farming equipment, HPS FENCE supports global distributors, wholesalers, importers, and brands with reliable products, flexible OEM/ODM customization, and long-term supply solutions.